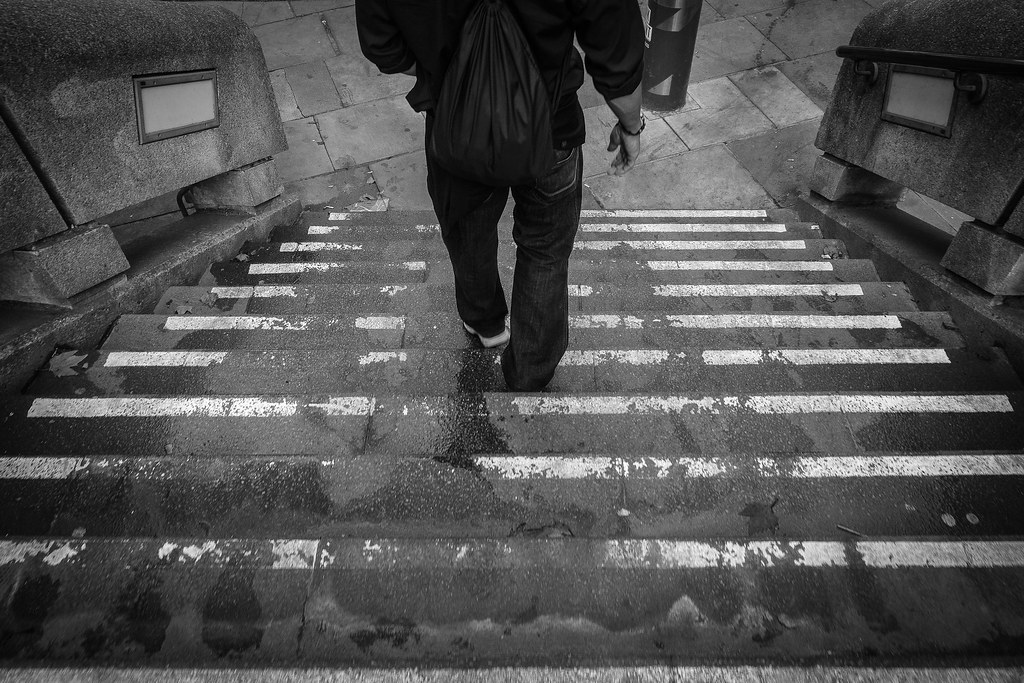
Street photography on the southbank with the Fuji XE1
A few weekends ago I popped up to see Pacific Rim on the IMAX in Waterloo, and thought I would try and get a spot of street photography in down at the Southbank by the river. The lovely thing about the Southbank is the sheer variety of people you see wandering about, and while I'm still working on my confidence in terms of approaching people for photos, there is certainly a lot of scope for getting some great shots.
I thought I would round up a few of the shots that I took, and do a bit of a breakdown on the settings I used and reasons why, so others can hopefully benefit. The great thing about street photography is that it doesn't need any fancy equipment or even expensive lenses - photos usually have a deep depth of field, so any lens will do, and whether you use a zoom lens or just use a prime and zoom with your feet is up to you.
Use a small camera
I was using a Fuji X-E1 as it's smaller than the average dSLR, and doesn't draw much attention to itself, so I could walk around with it on, and just lift it to my face, compose and fire in a matter of seconds. If you have a digital camera (or film for that matter) that can be set to manual mode then all the following applies, but for street photography, I would advise a smallish camera.
User a wide lens
I ended up using an 18-55mm lens and generally shot between f4 and f13, depending whether I wanted to try and isolate my subject a bit, or show everything in focus. f4 isn't the fastest shutter speed granted, but zoomed out to 55mm does allow for a bit of bokeh and subject isolation.
18mm is great as even taking into the effect of a cropped sensor, you can shoot and get a lot in, then crop down in post if you haven't got time/are in the wrong position to frame properly.
Preparation is key
The thing I find with Street photography is that you just wander into potential shots that potentially are only there for a few fractions of a second, so the key is preparation. Everything you can do beforehand to enable you to take a quicker shot (settings, focussing, and even zooming) means that you have just to focus on two things - framing the shot and pressing the shutter button.
Shooting before people react/notice you
I had the camera down by my side with a wrist strap, and all settings preset. The camera was on and ready to fire, so all I had to do was to lift, frame and click. If you practice looking at things in terms of how you might frame them for a shot (something as a photographer I do quite a lot), then you can pre-visualise quite a bit, and actually fire off a shot of someone so quickly they hardly notice, of if they do they have no time to react.
RAW v.s. JPEG
As everything generally is quite a bit simpler (and looks more arty), I ended up going shooting in black and white. For the ultimate in control shoot in colour RAW then do some post production (there's an excellent tutorial on black and white conversion on Youtube by JoeyL) and you'll end up being able to rescue a lot more shots.
Lazy JPEGS
For this outing I was feeling a lot lazier, and having heard good things about Fuji's JPEG quality, I ended up shooting directly in B&W JPEG. This limited the range of adjustments I was able to make after the fact, but some days you just want to spend your time out shooting and not stuck in post, and I was quite happy with several of the shots that came out.
Settings
ISO: 6400 (Auto)
To try and get properly exposed photos, I decided to let the camera decided what it should use, up to 6400 ISO, as in black and white the noise pretty much just came out as film grain.
All other settings were fixed/manual.
Shutter speed
The majority of shots I set a 1/500 second shutter speed to ensure that if people were moving I would freeze the action.
Aperture
Aperture was set pretty much as open as it could be (f4 at 18mm and f5.6 at 55mm) to let as much light in as possible, as quite a bit of the Southbank is under cover. This isn't a hard and fast rule really, as if you were out somewhere in the sunshine, then you would end up shooting a too fast a shutter speed, so have to up your aperture. If you pre-empt the conditions you will be shooting in, you can make a fair few assumptions about what settings you need to use.
Noise reduction
I wanted to use Lightroom for finer control over the noise/grain, so had set this to -1 as Fuji can be a bit aggressive in it's noise reduction.
Manually Focusing
For me this was key - the Fuji takes a second or two to lock onto something focus wise, and some cases where it was dark or there wasn't much contrast, it failed to lock on.
Despite Fuji's excellent strides with recent firmware updates (a subject for another blog post), manual focusing is still too slow for street photography when using the focus ring, due to the window of opportunity for a shot. I got very frustrated for a while, then remembered about zone focusing.
Zone Focusing
Basically for a given aperture and focal length, you can pre-determine what range is going to be in focus, set things manually, and turn auto focus off so you are preset and can just shoot.
As a street photographer, I knew that I wasn't going to be shooting shorter than 2m away roughly, and I wanted pretty much everything between 2 and 5 metres to be in focus. By pre-setting the focal range, and turning the camera's auto focus off, you essentially are cutting out the time you need to gain focus, and can shoot instantly.
At 18mm, I knew that at f11 and 1/500th of a second, that everything between 1.75m and 4.5m would be in focus using manual focus. Luckily my camera has a handy DOF indicator showing the range as you adjust the settings, so all I had to do was decide what range I wanted to shoot at for what focal length, and pre adjust the settings to match.
If you haven't got a camera that does this, if you have a play around with an online depth-of-field calculator to figure out what settings you need to set your camera at in manual mode to achieve such a range zoomed out and zoomed in, then you can just dial these in.
For more about Zone Focusing check this excellent Digital Photography School article, who go into a lot more detail.
Post Production
As I already had been shooting Black and white JPEGs, all I had to do was a little cropping, vignetting and sharpening. With black and white, I like playing with the exposure, and also adding a vignette to draw the viewer's eye into the frame.
Final thoughts
The Fuji X-E1
The Fuji X-E1 is a perfect camera for street photography, due to it's small size, full manual control and sharp lenses. Any of it's quirks (such as sometimes not locking on focus in low light) can be worked around by using manual settings, and the addition of focus peaking in recent firmware really helps.
Approaching people
This is always the hard one. It always feels awkward approaching people to ask for a shot, and it's something that I'm working on improving. For the most part, as long as you don't cross into their personal space, it's easier to ask for forgiveness after the fact across the street with a friendly smile after taking a shot, and most people are fine. Use your common sense, be quick and don't act creepy.
However, some shots you really need to to get up close and personal, and for those I've started going up to briefly chat to them first, and then asking for a shot. People generally like it if you show a friendly interest in them rather than just having a camera shoved in their face, and often don't mind posing for a shot, and if all it takes is a few seconds of chatting in exchange for a relaxed shot, then it's totally worth it.
Changing settings
When I go again, I think I will shoot in RAW for the maximum control, and do some post processing, as I definitely had a few shots that weren't properly exposed, for which RAW (with it's latitude of a stop or so of exposure either way) would have rescued.
I definitely need more practice shooting in manual, but love the control that it gives, and will be reading and learning more it, and trying it out for future outings.
Practice!
Street photography is hard, but unlike many other types of photography (landscape/studio work) you don't need many special tools or to be any special places, and the street is never far away, so get out there and give it a go!